
The game will start with the following menu:
Do you want to the game run
  1) Fullsceren / No Antialiasing (Fastest)
  2) Fullscreen /    Antialiasing (Best Looking)
  3) Windowed   / No Antialiasing
  4) Windowed   /    Antialiasing (Not recommended)
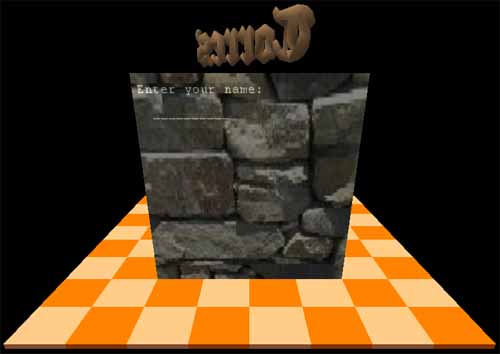 This is the first screen that will come up. Simply type in your name and press enter.
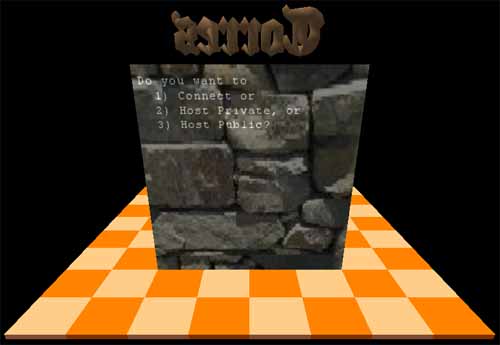 If you are hosting the game and don't know your IP address or don't want to have to relay it to everybody, press '3'. This option, with the input that follows, will register the game to an internet database. Your friends (or strangers) can then connect to your game.
If you want a private game, you must know your IP address and the port the game will run on (which you enter on the next screen). You then share this information with your opponents and use option '2' on this menu.
If you want to connect to a game, press '1' and following the prompt on the next screen. (These will be described below.)
 No matter which option you previously picked, you must enter the local port you will be using. On modems, feel free to enter in any value, typically any number above 1024. If you have a firewall running, you will need to follow my firewall instructions for setting up your network. If you are the host and have a private game running, this port must be shared with your opponents.
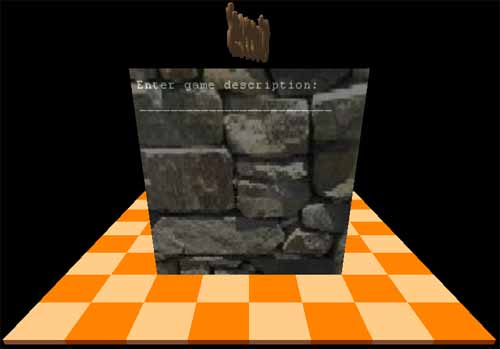 If you are the host and the game is public, you will need to enter in a game description. This game description will be displayed on a menu that your opponents will see. This name will also be used in the Hall of Fame records.
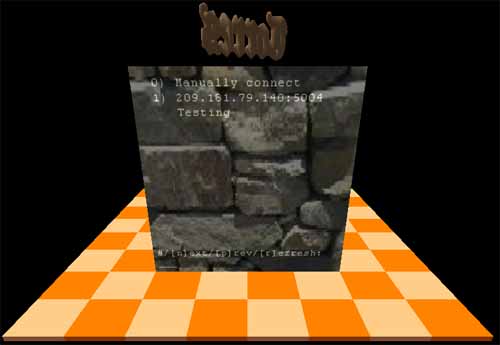 If you are trying to connect to a game, this is the screen you will see. This screen only displays 6 games at a time. To see the other games, type [n] and press [Enter] for the next screen and [p] and [Enter] for the previous screen. To pick a game, type the number of the game and press [Enter]. If you are connecting to a public game and the list is empty, press [r] and [Enter] to refresh the list from the internet database.
If you press [0] and [Enter] (the Manually connect option), you will get two more screens. The first will ask for the host's IP address. Enter the numeric address (e.g. 123.456.789.012). It will then ask for the host's port. Enter the port that the host previously gave you. If your host did not give you a port number, you will not be able to connect to the game.
 Before the game begins, you will be in a lobby where you can chat with the opponents currently connected. Simply type and the press [Enter] to chat.
You will need to pick your color and state that you are ready through chat-based commands. These commands will be shown on the screen once you are in the Lobby (they are missing from the screen shot shown). To set your color, simply type a slash followed by the word color, a space, and then the name of your color (e.g. /color red). To state that you are ready, simply type a slash followed by the word ready (e.g. /ready).
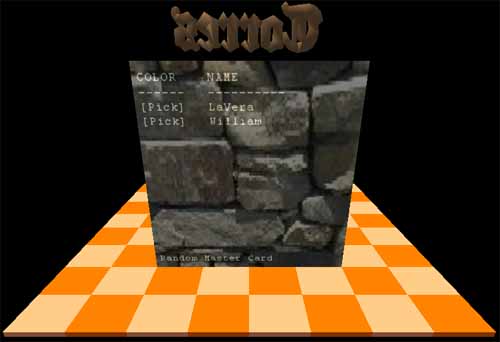
As host, you have two special duties. First, you can change the master card used by using the commands shown in the upper left-hand corner of the screen. Second, you should not type the '/ready' command until EVERYBODY has connected. Once everybody has issued the '/ready' command, the game will automatically begin.
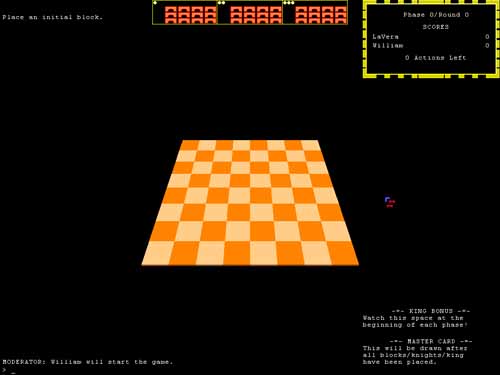 This is the screen you will see after the game begins. If you have the mouse cursor which shows two blocks, you place the first block. Each player in turn places a block (more than 2 spaces away from all other blocks) until 8 blocks are placed. Each player then places a knight on an empty block. Finally, the king is placed on any remaining empty block.

These are the various mouse cursors. The first one means that it is your turn. From here, you can either press the Right Mouse Button [RMB] to bring up a menu, click on an off-board block to place it, or click on an off-board knight to place it.
The second cursor states that you need to place a knight. This can be at the beginning of the game or after you have clicked on an off-board knight.
The third cursor states that you need to place a block. This can be at the beginning of the game or after you have clicked on an off-board block.
The fourth cursor states that you need to place the King. This happens after the first and second rounds and only applies to the lowest scoring player.
The last cursor states that it is not your turn and you should wait for your turn.
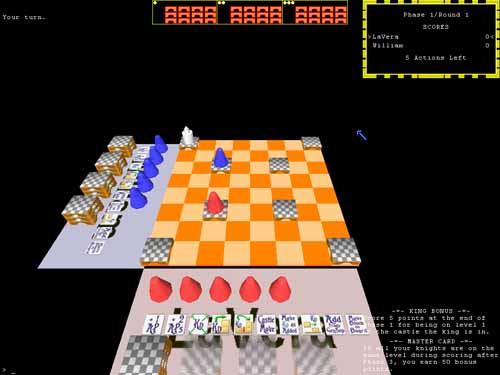 After all of the blocks, knights, and the king have been placed, the game will begin. In front of you are your blocks, knights, and the ten cards (these are defined below).
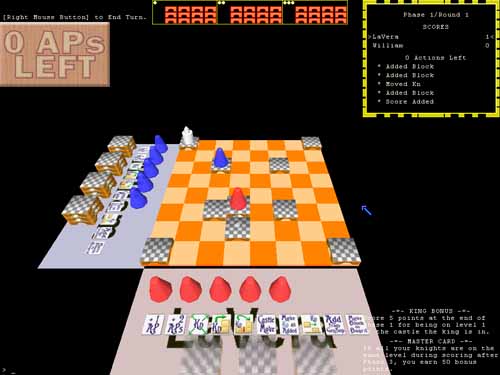
In the upper left-hand corner, there will be text telling you what you need to do right now.
At the top center, there is an image stating how many stacks of blocks and how many blocks you will get at the beginning of Phase 1, Phase 2, and Phase 3 (represented by the dots).
In the upper right-hand portion of the screen, the scores, play order, current player (marked with a '>' and '<'), and the current player's actions are displayed.
In the lower left-hand portion of the screen is the chat region. Simply start typing and hit enter to chat. Press [CTRL]-[u] to clear the chat line (since backspace is ever so slow). You can also type '/help' (without the quotes) to see a list of other commands that are available.
The lower right-hand portion of the screen explains any scoring bonuses that might be given and when. Make sure to read this frequently, as it changes between Phases.
CONTROL:
The arrow keys move you around the board. The [Page Up] and [Page Down] keys will zoom you in and out. The [Home] key will move the camera to its original positions. Simply typing and hitting enter will chat a message to everybody. [F11] takes a screen shot and puts it in the running directory. (These are about 2.25 megabytes, so don't go willy-nilly with this.) [Delete] will undo your last move. [F12] is the emergency exit.
The [CTRL] key is a "tool-tip" key. Pressing it while the mouse is over a stack will give you the height of the stack and the area of the castle. (It will look like "H[x] A[n]" where 'x' is the stack height and 'n' is the area. Pressing it while the mouse of over a card will give a slightly longer description of the card.
The left mouse button (LMB) will do the basic actions (do not drag the pieces, click and click again):
 This is what the Right Mouse Button [RMB] looks like. It will have different options depending upon what you are currently clicked on.
To play the cards, you must click the right mouse button [RMB] in certain locations (cards described from left to right as seen in the game):
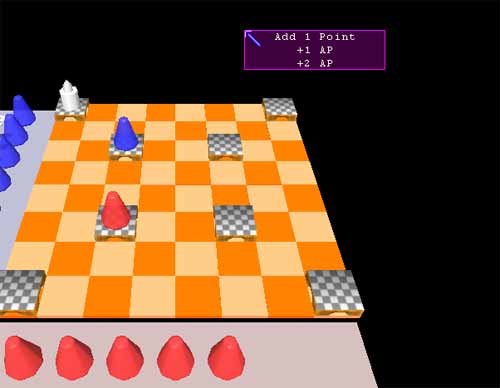
 - +1 AP: RMB anywhere.
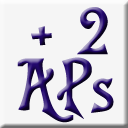 - +2 AP: RMB anywhere.
 - Move Knight (Kn) Diagonal: RMB on an on-board knight.
 - Move Kn Up 2 Blocks: RMB on an on-board knight.
 - Jump Kn or King: RMB on an on-board knight.
 - Move In Any Castle Door, Come Out Any Castle Door: RMB on an on-board knight.
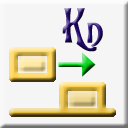
 - Move Kn As Added: RMB on an on-board knight.
 - Add Block Under Kn: RMB on an on-board knight. (Uses a block from your last stack.)
 - Add Block from the General Supply: RMB on a valid on-board location.
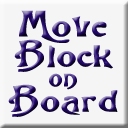 - Move a Block Already on the Board: RMB on a valid movable block.
 When your turn is over, the engraved wooden board (as seen in the upper left) will appear stating that you have no actions points left. This does not mean your turn is over. If you haven't used a card yet, you can still do so. If your turn is done, press the Right Mouse Button [RMB] and select "End Turn" from the menu.
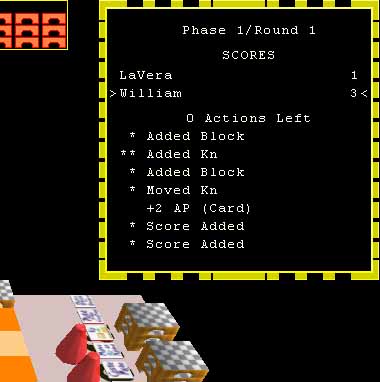 Finally, this is the action panel. It states the current Phase number (of which there are three) and Round number (which varies upon the number of players).
Next, it shows the scores of all the players. The play order is the order in which the names are shown. The play order can change from Round to Round. The arrows ('>" and '<') next to a name shows the current player.
Finally, it shows how many action points are left, followed by the actions currently taken by the current player. The stars to the left of the text indicate how many action points were used for that action. For example, adding a knight takes two action points, while using the "+2 AP" card (or any card, for that matter) uses no action points. (In fact, besides these two actions, all other actions take one action point.)
Special thanks goes to Chad Weisshaar, Garrett Gradisar, Brenda Simms, Daniel Owens, Jeanne Barnett, David Barnett, and Doug Swartzendruber for their continual testing (especially to Chad Weisshaar's stress testing) and suggestions to keep the interface nice to use. THANKS!